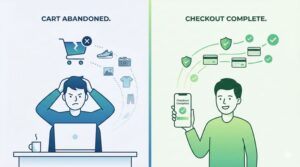
Somewhere between 60 and 80 percent of online shopping carts get abandoned before checkout. For most ecommerce businesses, that’s not a small leak — it’s the single largest source of lost revenue sitting right there in plain sight, fully recoverable with the right follow-up. Abandoned cart emails are consistently one of the highest-performing automations any online store can run, and Omnisend has built one of the more capable, purpose-built systems for setting them up without needing a developer.
This guide covers exactly how to set up abandoned cart automation in Omnisend, the settings that actually matter, and the strategic choices that separate a cart recovery flow that quietly recovers 5–15% of otherwise-lost sales from one that just gets ignored.
Why Abandoned Cart Emails Work So Well
Abandoned cart recovery sits near the very top of automated email performance because of one simple fact: a shopper who added something to their cart has already shown far more purchase intent than someone casually browsing a newsletter. The email doesn’t need to create interest from scratch — it just needs to remind someone of the interest they already demonstrated, and often gently remove whatever friction or distraction interrupted their checkout.
Data from Omnisend’s own user base shows just how concentrated this value is: abandoned cart recovery, alongside welcome series, accounts for the large majority of all revenue generated through automation. And once a shopper actually clicks through from an abandoned cart email, a meaningful share of them go on to complete the purchase — the click is often the hardest part to earn, and the email format Omnisend provides is specifically designed to make that click easy.
Understanding Omnisend’s Abandonment Automation Family
Before building anything, it’s worth understanding that Omnisend actually separates cart-related abandonment into distinct automation types, each targeting a slightly different moment in the shopping journey:
Abandoned Cart targets contacts who added an item to their cart but never started the checkout process at all.
Abandoned Checkout targets contacts who began the checkout process — entering some information — but didn’t complete the purchase.
These two are closely related but mutually exclusive in a well-configured setup: if a contact proceeds to checkout, they automatically exit the Abandoned Cart workflow and become eligible only for Abandoned Checkout messaging instead. Omnisend recommends enabling both, since together they cover the full range of purchase-intent moments where a nudge can make the difference.
There’s also Product Abandonment and Browse Abandonment, which target lower-intent behavior like viewing a product page or browsing your store without adding anything to a cart — these are worth exploring once your core cart recovery flow is dialed in, but they’re a separate topic in their own right.
An Important Limitation to Understand First
Abandoned Cart and Abandoned Checkout automations only work for identified contacts — meaning Omnisend needs to already have a way to recognize who the visitor is. A contact becomes identified when they sign up through an Omnisend signup form, click a link in an Omnisend email, or submit their email during checkout. A completely anonymous visitor who adds an item to their cart without ever being identified in one of these ways simply cannot receive an abandoned cart email, even if their email address already exists elsewhere in your contact list.
This is a useful thing to understand early, because it shapes how you think about testing and expectations: growing your signup form presence and making sure checkout captures email early both directly increase how many abandoned carts you’re actually able to recover.
Step 1: Create the Workflow
From your Omnisend dashboard, click Automation in the sidebar, then Create Workflow. You’ll see a library of pre-built workflows organized by goal — look for the Cart Abandonment category and select the Abandoned Cart preset, then click Customize Workflow.
Starting from the preset rather than building from scratch is strongly recommended for this particular automation, since it comes pre-loaded with sensible default triggers, timing, and message templates based on what performs well across Omnisend’s user base — you’re customizing a proven starting point rather than guessing from zero.
Step 2: Configure the Trigger and Delay
Inside the workflow builder, you’ll see the trigger block already set to fire on cart abandonment. The key setting to review here is the inactivity delay — how long Omnisend waits after someone abandons their cart before considering it officially “abandoned” and beginning the automation. The default is typically around one hour, though many stores test shorter delays.
It’s genuinely worth testing different delay windows. Common test points are 30, 45, and 60 minutes, comparing open and click rates across each to find the sweet spot for your specific audience — send too early and you might catch someone who was just briefly distracted and would have checked out anyway; send too late and the moment of intent has cooled.
Step 3: Add Filters if Needed
Within the same trigger settings, you can add optional filters based on cart value, specific product collections, or customer segment. This is useful if you want, for example, a different (perhaps more aggressive, discount-inclusive) recovery flow for high-value abandoned carts versus a standard flow for smaller ones. For a first setup, a single unified flow is perfectly reasonable — filters are a refinement to add once your baseline flow is working and generating data.
Step 4: Build the Email Sequence
A typical, well-performing abandoned cart sequence uses two to three emails rather than just one:
Email 1 sends shortly after the configured delay — a straightforward, friendly reminder showing exactly what was left in the cart, with clear product images and a direct link back to checkout. No discount needed at this stage; many shoppers simply got distracted and just need the nudge.
Email 2 sends roughly 24 hours later if the cart is still unrecovered, often introducing a modest incentive like a discount code or free shipping offer to overcome any hesitation that a simple reminder didn’t resolve.
Email 3, if used, sends a day or two after that as a final, slightly more urgent message — sometimes incorporating scarcity (“your cart is about to expire”) or a stronger incentive for shoppers who still haven’t converted.
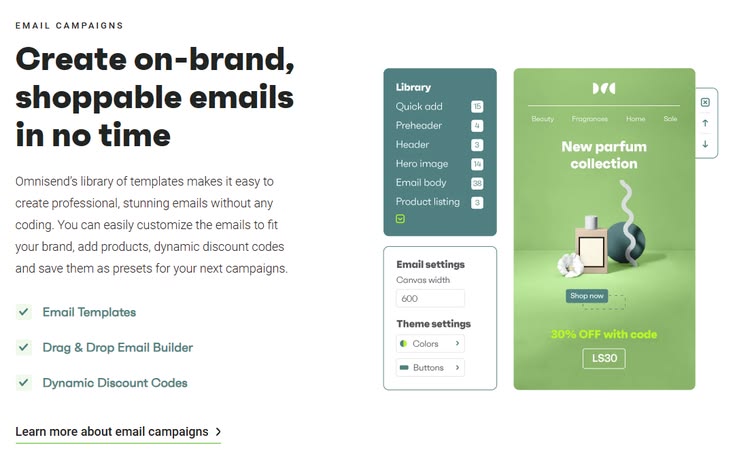
Within Omnisend’s drag-and-drop editor, make sure each email dynamically pulls in the actual abandoned cart contents using the platform’s product blocks, rather than sending a generic message with no reference to what was actually left behind. This personalization is a major part of why cart abandonment emails outperform generic promotional sends — the email is directly relevant to something the recipient specifically did.
Step 5: Set an Exit Condition
This step matters more than it might seem. Add an exit condition so that the workflow automatically stops sending further emails to anyone who completes their purchase mid-sequence. Without this, you risk the awkward and slightly embarrassing experience of sending a “did you forget something?” email — or worse, a discount code — to someone who already checked out.
Omnisend’s builder typically makes “order placed” available as a straightforward exit condition to add here.
Step 6: Manage Frequency and Avoid Duplicate Sends
By default, Omnisend limits how often the same contact can trigger this automation — commonly once every 24 hours — to prevent someone from receiving a flood of recovery emails if they abandon multiple carts in quick succession during the same browsing session. You can adjust this frequency window in the workflow’s settings if your business has a reason to change it, though the default is a sensible starting point for most stores.
If you’re on Shopify or BigCommerce and these platforms have their own native abandoned cart reminder feature enabled, disable it before activating Omnisend’s version. Running both simultaneously means customers receive duplicate, overlapping messages from two different systems, which looks disorganized and can actively hurt your brand’s credibility.
Step 7: Consider Adding SMS
Omnisend supports adding SMS as a channel alongside email within the same abandoned cart workflow, letting you reach shoppers through a second channel for higher visibility. One technical nuance worth knowing: for new contacts, Omnisend only syncs a phone number to a contact record after their first completed order. This means a brand-new shopper’s very first abandoned cart typically can’t include an SMS message — only email — since Omnisend doesn’t yet have a verified phone number on file for them.
Step 8: Test Before Launching
Use Omnisend’s trigger preview or test tool to confirm the workflow behaves as expected before it goes live to real customers. Add an item to your cart using a test account connected to an identified contact (signed up via your store’s form, for instance), and confirm the workflow triggers correctly, the delay behaves as configured, and the email displays the correct product information, images, and pricing.
Double-check on both desktop and mobile views, since the majority of ecommerce traffic and email opens now happen on phones.
Step 9: Publish and Activate
Getting an Omnisend automation live actually requires two separate actions worth understanding clearly: publishing the workflow saves your current version as the active one, while activating it turns the workflow on to actually start processing contacts. Publishing without activating leaves the workflow built but dormant. Activating without publishing runs whatever the previously published version was, even if you’ve made unsaved edits since. Make sure you’ve done both before assuming your automation is live.
Once live, the workflow’s status will show as Enabled on your Automation dashboard, and you can track its performance — including recovered revenue — directly from there.
Refining Your Cart Recovery Flow Over Time
Once your baseline abandoned cart flow has been running for a few weeks, use the performance data to refine it:
Test your delay timing against your open and conversion data rather than leaving the default in place indefinitely.
Test discount thresholds — a smaller incentive sent slightly earlier sometimes outperforms a larger incentive sent later, and vice versa, depending on your average order value and margins.
Segment by cart value. High-value abandoned carts often deserve a different tone or incentive structure than smaller ones, since the economics of offering a discount look very different depending on order size.
Layer in Abandoned Checkout separately. If you’ve only built the Abandoned Cart flow so far, adding the complementary Abandoned Checkout automation captures an entirely different, often higher-intent group of shoppers who got further into your funnel before dropping off.
Abandoned cart recovery is one of the rare automations in ecommerce where the return on setup time is almost immediate and easy to measure directly in recovered revenue. A few hours spent configuring it properly in Omnisend, with sensible timing, genuine personalization, and a clean exit condition, typically pays for itself within the first week of being live — and then keeps paying every week after that without any further attention required.