
Video is the primary medium through which most online courses deliver their content, which makes production quality a meaningful factor in how students perceive — and engage with — your course. But “production quality” doesn’t mean expensive cameras or professional studio lighting. It means clear audio, legible visuals, focused pacing, and a format that keeps students engaged and learning effectively, all of which are achievable on a modest budget with the right approach.
This guide covers the practical best practices that matter most for course video production, from equipment basics to editing decisions that actually affect student learning outcomes.
Audio Quality Matters More Than Video Quality
If you can only invest in one piece of equipment beyond what you already own, make it a decent external microphone. Viewers are remarkably tolerant of mediocre video — a slightly grainy webcam recording is easy to watch — but poor audio (echoey rooms, background noise, inconsistent volume) is exhausting to listen to and one of the fastest ways to lose a student’s attention, regardless of how good your content actually is.
A simple USB microphone positioned close to your mouth dramatically outperforms a laptop’s built-in microphone. Recording in a room with soft surfaces (carpet, curtains, upholstered furniture) reduces echo significantly compared to a bare room with hard walls and floors. If background noise is unavoidable, basic noise-reduction tools included in most video editing software can help clean up minor issues, though they’re not a substitute for a reasonably quiet recording environment to begin with.
Lighting: Simple Setups That Look Professional
You don’t need studio lighting to look polished on camera. Natural light from a window facing you (not behind you, which creates a silhouette) often produces flattering, professional-looking results at zero cost. If natural light isn’t reliable or available, an inexpensive ring light or a simple two-point lighting setup (one light in front, slightly to the side, and a softer fill light on the other side) covers most course video needs without significant investment.
Avoid overhead-only lighting, which tends to create harsh shadows under the eyes, and avoid strong backlighting from a window behind you, which makes it difficult to see your face clearly.
Choosing the Right Video Format for Each Lesson
Different types of content call for different video formats, and matching the format to the content improves both clarity and production efficiency:
Talking-head video (you speaking directly to camera) works well for introductions, conceptual explanations, and personal storytelling, since it maintains a direct connection with the student.
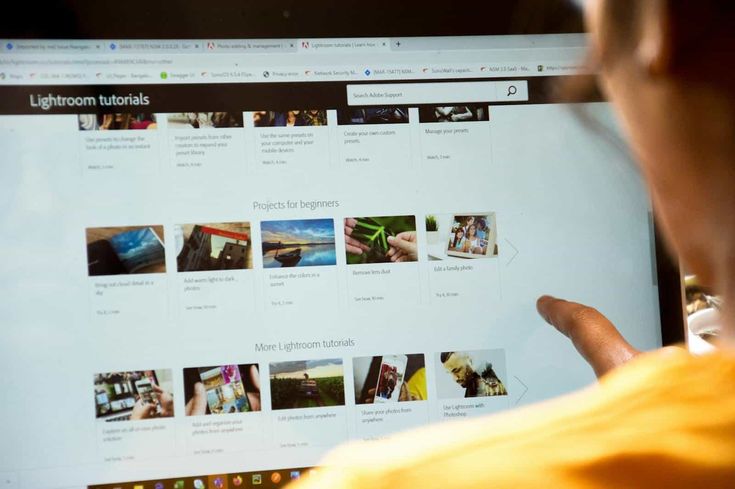
Screen recording is ideal for any software demonstration, walkthrough, or step-by-step digital process, letting students see exactly what you’re doing on screen rather than trying to interpret a verbal description alone.
Slide-based presentation works well for structured, information-dense content — frameworks, statistics, or multi-part concepts — where visual organization helps students follow along and retain the material.
Hybrid formats, combining a small talking-head video overlay with screen recording or slides, are often the most effective for tutorial-style lessons, since students benefit from both the personal connection of seeing you and the clarity of following along with visual demonstration.
Keep Individual Lessons Short and Focused
Long, unbroken video lessons covering multiple concepts at once tend to reduce both engagement and retention compared to shorter, tightly focused videos. As a general guideline, most effective course lessons run somewhere between 5 and 15 minutes, covering a single specific concept or task per video.
If a topic genuinely requires more time to teach thoroughly, consider breaking it into a short series of connected lessons rather than one long video. This also has a practical benefit for your drip content and progress tracking: students get a clearer sense of accomplishment as they check off multiple shorter lessons compared to sitting through one lengthy video with no natural stopping points.
Script or Outline Before You Record
Recording without any script or outline often leads to rambling, tangents, and inconsistent pacing across your lessons, all of which increase editing time later and can make lessons harder for students to follow. At minimum, work from a detailed outline listing the key points you need to cover in order, even if you don’t write out a word-for-word script.
For lessons involving specific terminology, statistics, or a precise sequence of steps, a fuller script helps ensure accuracy and consistency, particularly important for technical or process-driven content where getting the order of steps wrong could genuinely confuse a student trying to follow along.
Batch Recording for Efficiency and Consistency
Rather than recording lessons one at a time over an extended period, batch-record multiple lessons within the same module (or even across several modules) in a single sitting. This offers several practical advantages: your energy, tone, and setup (lighting, camera position, background) remain consistent across the batch, and it’s significantly more time-efficient than repeatedly setting up and tearing down your recording setup for each individual lesson.
Plan your batch-recording sessions around your outline, grouping lessons that share a similar format (all talking-head lessons together, all screen recordings together) to minimize the setup changes required within a single session.
Editing: What Actually Matters for Learning Outcomes
Editing decisions should generally prioritize clarity and pacing over stylistic flourish. A few editing practices that meaningfully improve the learning experience:
Cut out significant pauses, filler words, and false starts to keep the pacing tight, without over-editing to the point of sounding unnaturally rapid or robotic.
Add on-screen text for key terms, steps, or takeaways, reinforcing important information visually alongside your verbal explanation, which helps with both comprehension and retention.
Use zoom-ins or highlights during screen recordings to draw attention to the specific area of the screen you’re discussing, especially important for software tutorials where small UI elements might otherwise be difficult for students to locate.
Add chapter markers or clear section breaks within longer lessons, allowing students to easily jump back to review a specific part without needing to scrub through the entire video.
Avoid over-investing in unnecessary stylistic elements — elaborate transitions, background music that competes with your voice, or excessive visual effects — which add production time without meaningfully improving the learning experience, and can sometimes actively distract from the content.
Equipment Recommendations for Different Budget Levels
Minimal budget: A smartphone camera (most modern phones record excellent video quality), a basic clip-on or USB microphone, and natural window lighting can produce a genuinely professional-feeling course with a total equipment investment of well under $100.
Moderate budget: A dedicated webcam or entry-level mirrorless camera, a quality USB or XLR microphone with an audio interface, and a simple two-point LED lighting kit represent a meaningful step up in polish, suitable for creators planning to produce multiple courses over time.
Higher budget: A full mirrorless or DSLR camera setup, professional lighting, and a treated recording space (or professional studio rental) make sense primarily for creators with an established course business and consistent revenue justifying the investment, or those in visually-oriented niches (design, photography, video editing) where production quality itself is part of the credibility signal.
For nearly all new course creators, the “minimal” to “moderate” tier is entirely sufficient — the difference in course sales and completion rates between good-enough production and highly polished production is generally much smaller than the difference between clear, well-organized teaching and confusing, poorly structured teaching.
Recording Screen Content Effectively
For screen-recorded tutorials, a few specific practices improve clarity significantly:
Increase your font and cursor size before recording, since default system settings are often too small to read clearly once compressed into video format, especially on a student’s mobile device.
Close unnecessary tabs, notifications, and desktop clutter before recording, both to avoid distracting the student and to prevent accidentally displaying anything private or unrelated to the lesson.
Narrate what you’re doing as you do it, rather than performing an action silently and explaining afterward, since real-time narration helps students follow the logic behind each step rather than just the mechanical action itself.
Record at a resolution appropriate for your platform’s playback, generally 1080p, which balances clarity with reasonable file sizes and load times for students on varying internet connections.
Reviewing and Iterating on Your Video Content
Once your course is live, use engagement analytics (see our companion guide on analytics tools for tracking student engagement) to identify which videos have unusually high drop-off or rewatch rates. A video with a significant rewatch spike at a specific point often indicates a confusing explanation worth revisiting, while videos with high overall drop-off may need to be shortened, restructured, or re-recorded with clearer pacing.
Treat your course videos as a living product that improves over time based on real student behavior, rather than a one-time production project that’s finished the moment it’s uploaded.
Common Video Production Mistakes to Avoid
Recording in a noisy or echoey environment without addressing it, since poor audio is one of the most common reasons students disengage from otherwise solid content.
Trying to cover too much material in a single long video rather than breaking it into focused, digestible lessons.
Over-investing in expensive equipment before validating that people actually want the course, when a smartphone and basic microphone would have been more than sufficient for an initial version.
Skipping a script or outline entirely, leading to rambling delivery that increases both student confusion and your own editing workload.
Final Thoughts
Great course video production isn’t about expensive equipment — it’s about clear audio, legible visuals, focused pacing, and content structured for genuine understanding rather than just information delivery. Prioritize a decent microphone and reasonable lighting, script or outline your lessons before recording, keep individual videos focused and appropriately short, and use real student engagement data to continuously refine your content after launch. These fundamentals will do far more for your course’s success than any high-end camera or elaborate editing style.

